OCPP Integration Zaptec Chargers
Zaptec chargers are configured through the Zaptec Portal (opens in a new tab). Log in with your credentials.
Zaptec Go, Go2, Home & Pro
Installation
To authorize an installation, click on Installations in the main navigation and search for your installation.

Once you've found your installation, click on the Settings tab and the sub-tab Authentication.
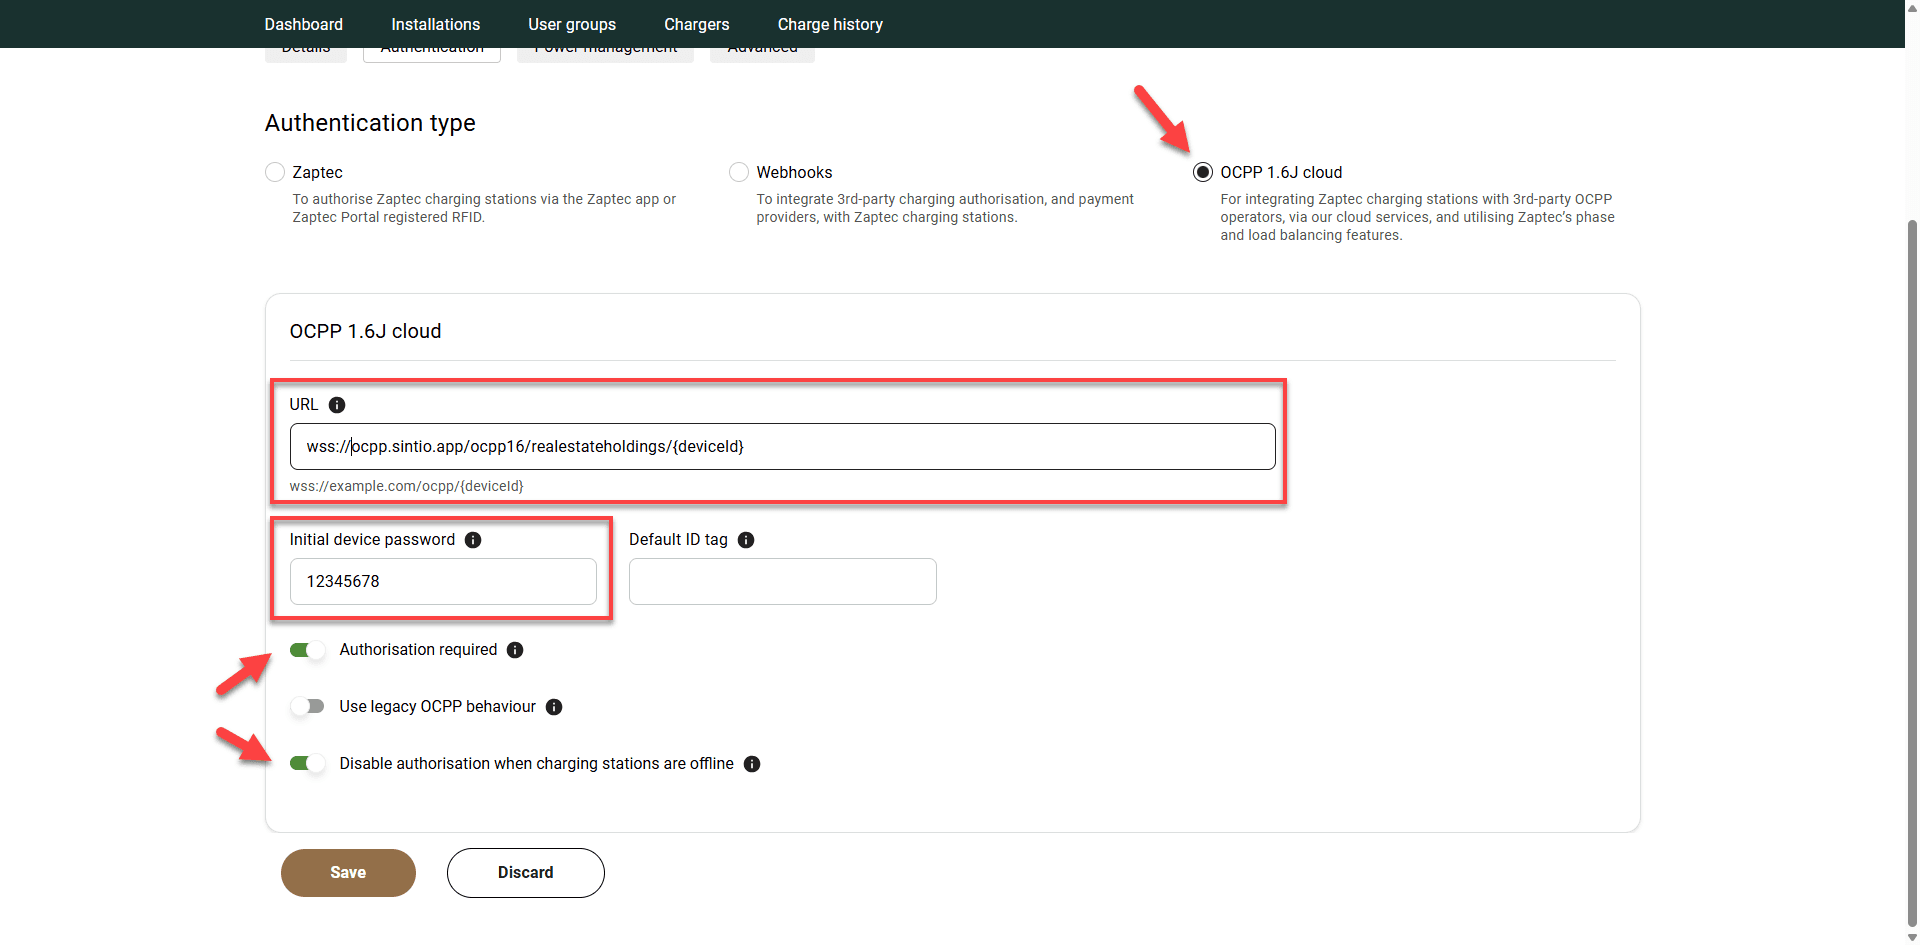
Select the Authentication Type OCPP-J 1.6 Authentication.

Next, replace {organisationId} with your actual organization ID. If you are unsure of your Organization ID, see OCPP Settings.
Incorrect settings will prevent your chargers from connecting to Sintio. Make sure that:
- Authentication required is turned on
- Legacy OCPP behavior is turned off

If you have successfully completed the above step, all of your Zaptec chargers in the installation will be linked to the Sintio portal.
Charger
To authorize additional chargers, click on Chargers in the main navigation and search for your charger.

Once you've found your charger, click on the Settings tab, and at the bottom of the page, you will reach the OCPP settings.
Next, replace {deviceId} with your actual charger ID. If you don't know your charger ID, go to OCPP Integration.
Complete the process by clicking Save.

Sintio as billing partner
Enter Sintio as a billing partner in the Zaptec Portal.
- Select the corresponding installation in the Zaptec Portal and open Permissions.

- Select «Give Permssion».

- Under Partner you can enter the Lookup key XN3E, select Sintio and confirm with Next.

- Grant the rights for Owner and Service.

Serial number
The serial number is located on the downside of the charger, as shown in the images below.

